Mosaigraph is a command line utility for making photomosaics.
A "photomosaic" consists of a large number of small images. When viewed together, they look like some other, larger image.
Here's an example produced by Mosaigraph:
The file contains about 2000 portraits obtained from Wikiart. When those portraits are stitched together into a mosaic, they look like Mona Lisa's face.
Here's another mosaic, a bit smaller:
It's Neil Armstrong composed of photographs taken by the Hubble Space telescope.
Hubble images from HubbleSite. Neil Armstrong photo from Wikimedia.
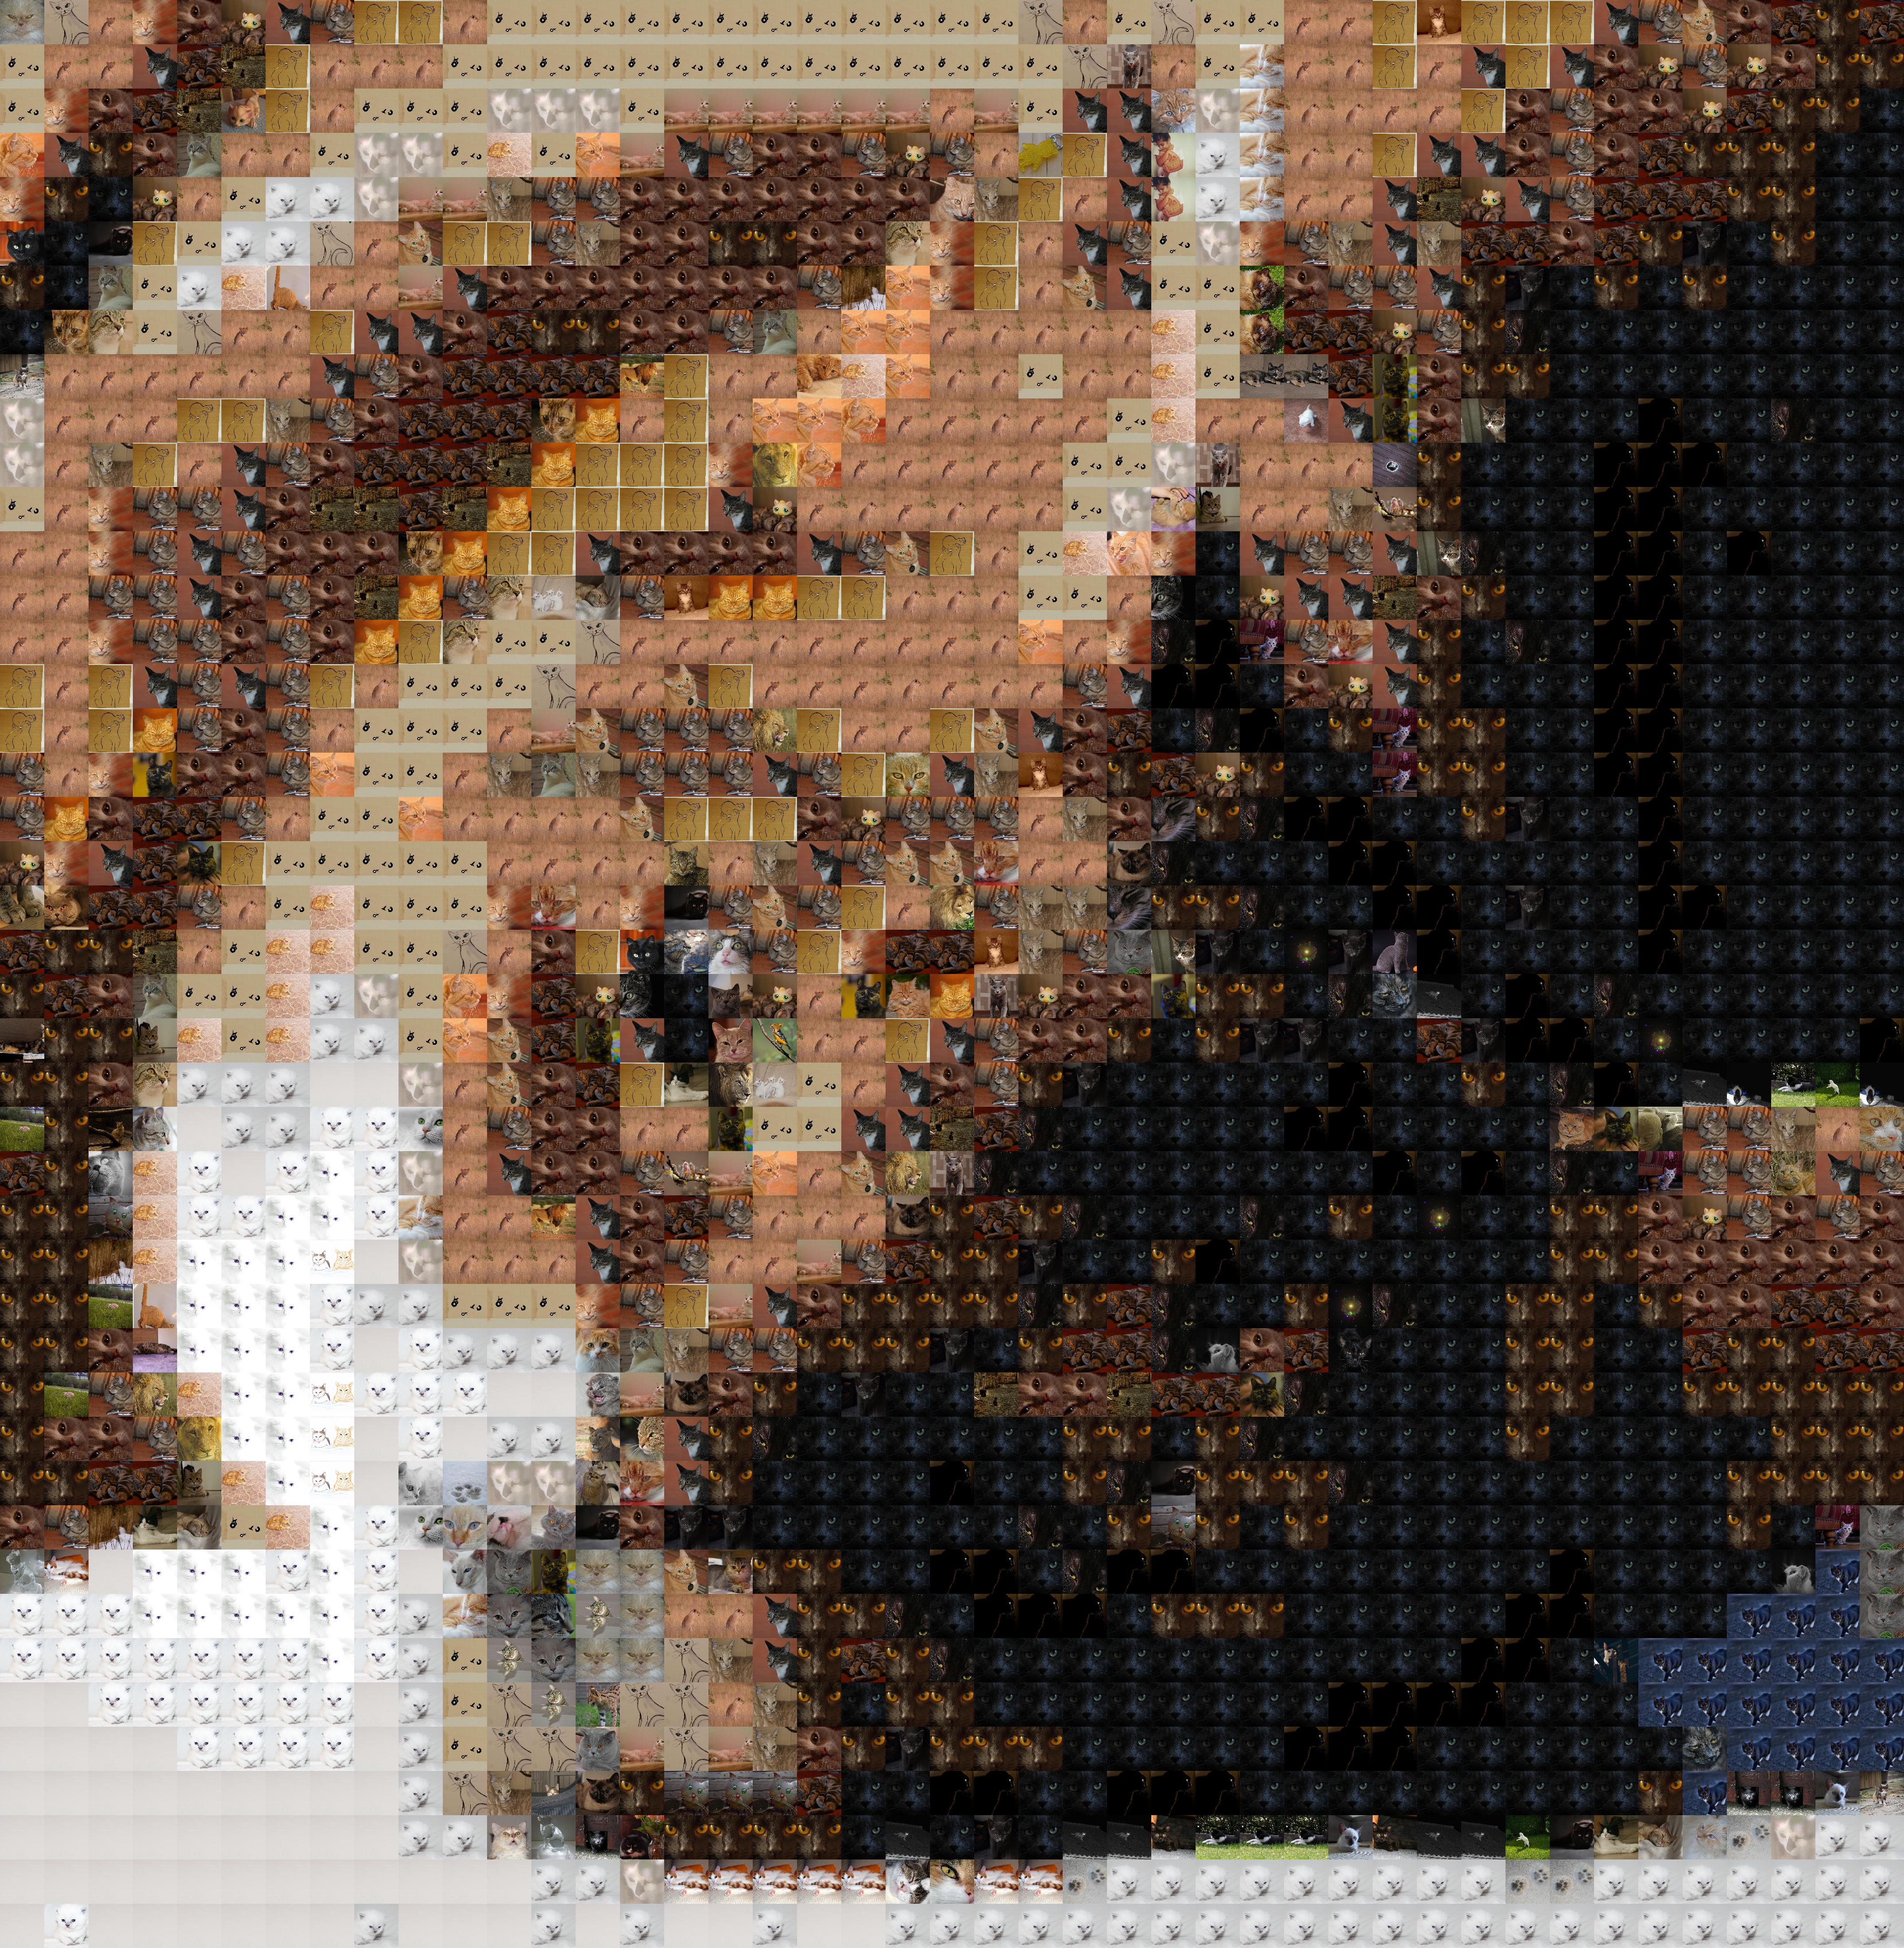
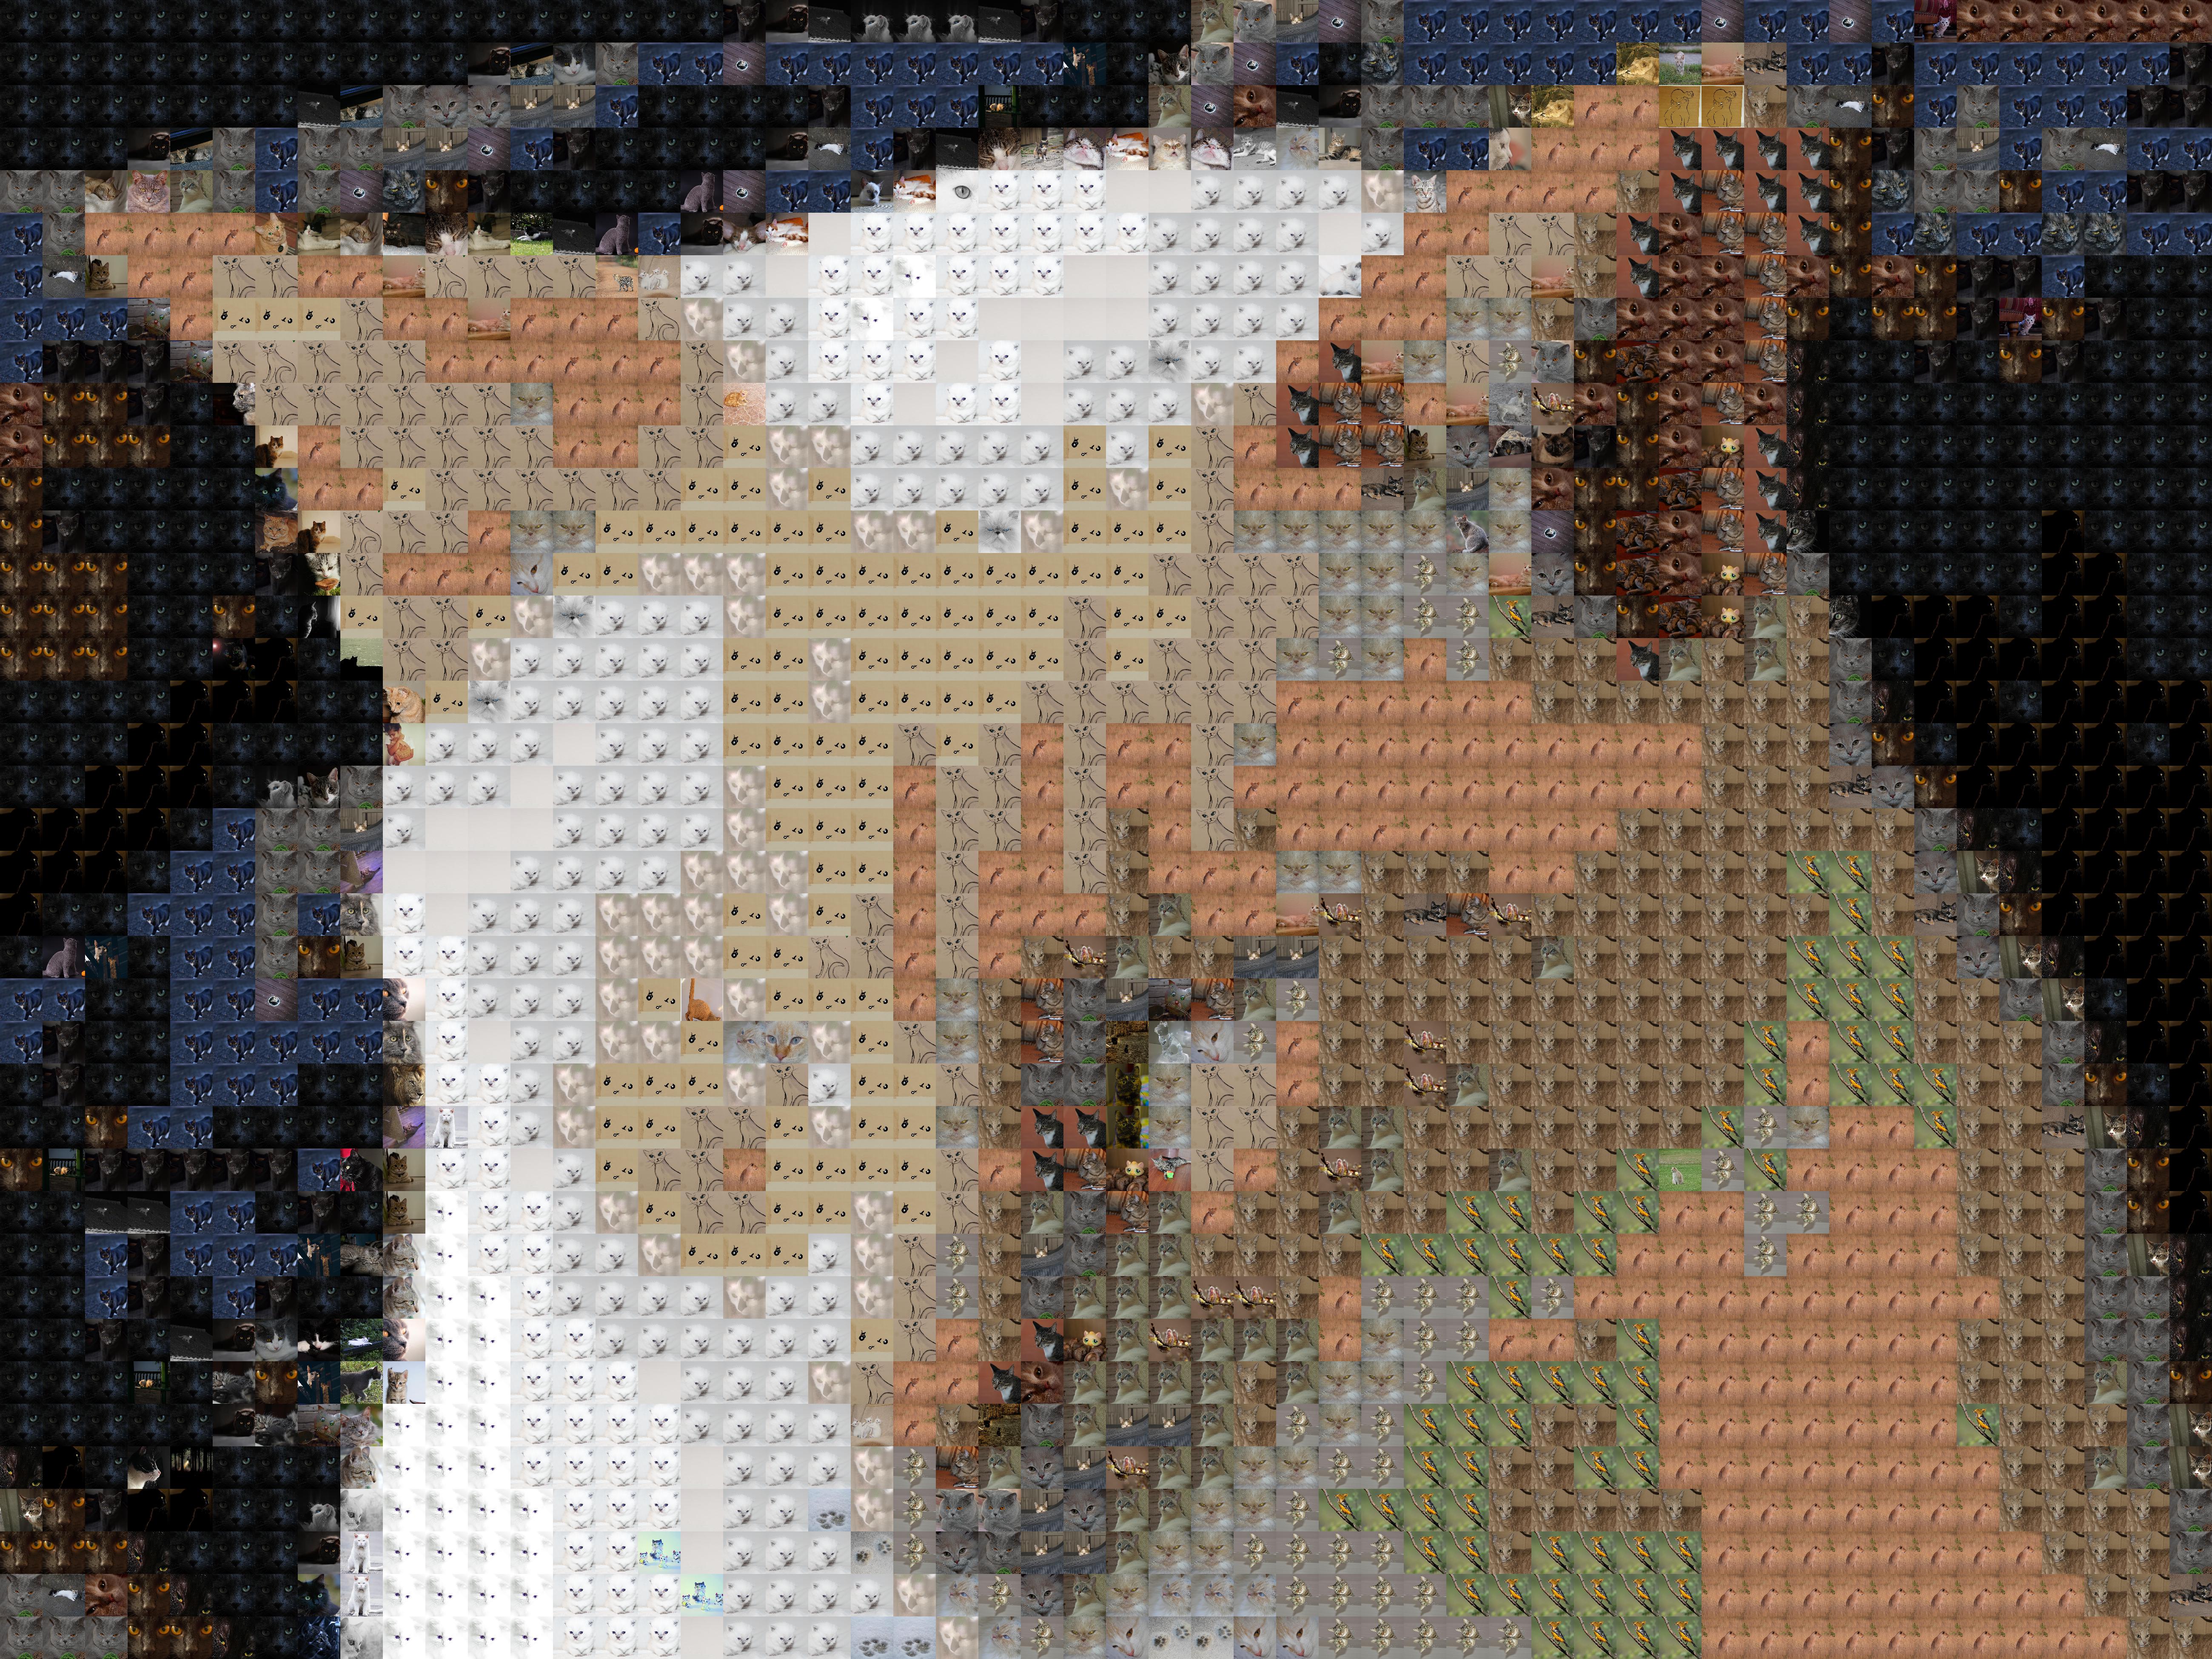
And here are some pictures of cats, made up of pictures of cats:
cedar.jpg | guido.jpg | maui.jpg
Pictures of cats from Pixabay and from personal collection.
Mosaigraph is written in Python. It should be compatible with Python 2 or 3.
You'll need to install the Pillow library to use it. You can do that using Pip:
pip install pillow
Installing Pillow will require you to be superuser, to use sudo, or to use virtualenv.
Once Pillow is installed, simply download the file "mosaigraph.py" and navigate to the directory that contains it. For example:
git clone https://github.com/saturn597/mosaigraph.git
cd mosaigraph
Now you can run the program as described in the following sections.
Say you've decided on the image you want your mosaic to "look like." Call it the "base image" and store it at base_image_path.
Say you also have a collection of images Mosaigraph can use as the pieces of the mosaic. Call them your "candidate images." They are stored in the directory candidate_image_directory.
You can produce a mosaic in two easy steps.
Step 1: Preprocess your candidate images
To start, Mosaigraph needs to learn some things about your candidate images. We'll call this learning "preprocessing."
A command like the following tells Mosaigraph to preprocess your candidate images and save what it learns to a new file named preprocessing_file:
python mosaigraph.py -P preprocessing_file -i candidate_image_directory
Mosaigraph will create preprocessing_file and will use it to save important data about your candidate images.
If you have a lot of candidate images, this can take a while. However, once you've created your preprocessing_file, you can use it to make as many mosaics as you want. You don't have to do the preprocessing step again (unless you want to use a different set of candidate images).
Step 2: Create the mosaic
Now, using the preprocessing_file you created above and the base_image_path you decided upon, create a mosaic with a command like this:
python mosaigraph.py base_image_path -p preprocessing_file [-o output_file] [-n number_of_pieces] [-u] [-w]
Flags/arguments in brackets are optional.
Once the mosaic is complete, Mosaigraph will try to open it in an image viewer.
If an output file is specified (using -o output_file), Mosaigraph will save the mosaic to that file. The file format depends on the extension you use - end output_file with ".jpg" for a jpg, etc. To ensure that your work gets saved, you should specify an output file.
Mosaics consist of about 500 pieces by default. You can specify a different number of pieces using the -n flag. Mosaigraph will try to get close to the specified number of pieces, though the actual number may differ slightly.
Use -u to ensure that each piece is "unique," i.e., that a given candidate image won't be used more than once.
Use -w to trigger "slow mode." In slow mode, Mosaigraph will take a lot longer to make a mosaic, but the result may look much better.
The preprocessing step is potentially very time consuming if you have a lot of images.
When starting out, consider making a preprocessing file with only a small number of images (<100). Using only a few images won't result in the best mosaics, but everything will happen faster. This way it'll be easier to play around and try things out.
Here again is the command we used in the quick start to create a preprocessing file:
python mosaigraph.py -P preprocessing_file -i candidate_image_directory
Actually, instead of just a single candidate_image_directory, the -i argument can take a space-separated list of directories and image files. You can use Unix wildcards here, like *.
Mosaigraph will preprocess any image files you list after -i. For any directory you list, Mosaigraph will attempt to preprocess all image files in that directory (but will not automatically proceed into subdirectories of that directory).
Files that cannot be processed as images will be ignored.
If you decide you want to use more candidate images for future mosaics, you can add them to an existing preprocessing file. Just run the same command you used to create the file, but specify the new set of images after -i. The new images will be preprocessed and Mosaigraph will save what it learns about them to the file. Images you already preprocessed won't be processed again.
It's possible to create mosaics without a preprocessing file by doing something like this:
python mosaigraph.py base_image_path -i candidate_image_list [-o output_file] [-n number_of_pieces] [-u] [-w]
...where candidate_image_list is a space-separated list of image files and directories containing image files.
However, Mosaigraph still has to do the preprocessing step - it will just do so without saving its work to a file. Once the mosaic is created and Mosaigraph exits, that work will be lost. If you make another mosaic using the same set of candidate images, and haven't saved a preprocessing file, or aren't referencing one that you've created, Mosaigraph will need to repeat the preprocessing.
When you create a preprocessing file, though, Mosaigraph saves its work so it doesn't have to repeat the preprocessing on subsequent mosaics. Thus, it's recommended that you create and work from preprocessing files as shown in the quick start.
Note that Mosaigraph's preprocessing files identify images by their absolute paths. This means that if you rename images or move them to a different directory after producing the preprocessing file, Mosaigraph will be unable to find them again.
Say we want to make mosaics that look like this image, part of the Mona Lisa. Say we saved that image as "monaface.jpg." That will be our "base image."
Say we also have about 18,500 portrait paintings that we obtained from Wikiart. They're stored in the directory "~/mosaics/portraits". These portraits will serve as "pieces" of our mosaic. They are our candidate images.
Start by preprocessing the portrait paintings and saving the results to a file called "portraitpreprocessing". To do this, run the following command:
python mosaigraph.py -P portraitpreprocessing -i ~/mosaics/portraits
If you have 18,500 images, you'll have to let this run over night and then some.
But once it's done we can make some mosaics!
Example 1
We can run the following command now:
python mosaigraph.py monaface.jpg -p portraitpreprocessing -o mona1.jpg
This creates a file called mona1.jpg that might look like this:
Okay! That's a start!
Disregarding the preprocessing, creating this mosaic didn't take long. The above command ran for about 1 minute on a 15-inch, mid-2010 MacBook Pro.
But we didn't capture much detail from the original image. It's hard to tell it's supposed to be the Mona Lisa, unless you zoom out and squint.
Example 2
Let's try making a mosaic with about 2000 pieces instead of the default 500:
python mosaigraph.py monaface.jpg -p portraitpreprocessing -o mona2.jpg -n 2000
We get this:
That's an improvement!
The 2000 piece mosaic took roughly twice as long to make as the 500 piece one (again, not counting the initial creation of the preprocessing file). But it looks much better.
Example 3
In the mosaics produced thus far, some candidate images were reused many times. For example, Mosaigraph repeatedly used Egon Schiele's "Portrait of Frau Dr. Horak" to stand in for Mona Lisa's skin.
Adding the -u option prevents Mosaigraph from using any candidate image more than once:
python mosaigraph.py monaface.jpg -p portraitpreprocessing -o mona3.jpg -n 2000 -u
And this is the result:
Producing a mosaic using -u may take longer, since Mosaigraph will have to load a larger number of distinct images. The above image, mona3.jpg, took about 7 minutes to create on the test machine (again, starting from the preprocessed candidate images in portraitpreprocessing).
For the -u option to work well, you'll need a pool of candidate images that is much larger than the target number of pieces. Otherwise, Mosaigraph will run out of good candidates and the mosaic will have large areas with little resemblance to the base image.
Example 4
We can also construct a mosaic using the "slow" method by adding the -w option. We run this command:
python mosaigraph.py monaface.jpg -p portraitpreprocessing -o mona4.jpg -n 2000 -w
Resulting in this image:
This takes quite a long time. It took 5 hours and 40 minutes on the test machine, still not counting candidate preprocessing! But the mosaic looks more like the Mona Lisa than any of the other examples so far.
Example 5
Let's also try using the -u option along with the -w option. So the mosaic will be constructed using the "slow" method and each "piece" of it will be unique.
The command looks like this:
python mosaigraph.py monaface.jpg -p portraitpreprocessing -o mona5.jpg -n 2000 -w -u
And the result looks like this:
Creating that image took about 5 hours, 12 minutes.
Example 6
You can create an even more detailed Mona Lisa mosaic by increasing the number of pieces to 5000:
python mosaigraph.py monaface.jpg -p portraitpreprocessing -o mona6.jpg -n 5000 -w -u
Here's the result - note it's a fairly large image:
Example 7
The Neil Armstrong image in the "About" section was creating using a command like this:
python mosaigraph.py armstrongface.jpg -p hubbleimages -n 3000 -o armstrong1.jpg
The preprocessing file hubbleimages was created based on only about 1500 images. We couldn't use the -u flag because there weren't enough images to make each piece unique.
By the way, using the "slow" approach on Neil Armstrong looks like this:
If you would like your mosaics to look better, there are a few options:
- Use a higher piece count (the
-ncommand line argument). - Use more and more varied candidate images. Scrapy is one way to quickly acquire lots of images. Also see Wikimedia's free media resource lists.
- Crop base images strategically. Including unnecessary background "wastes" a lot of pieces on the background, rather than using them for the more interesting parts of the image.
- Try using the "slow" comparison method (the
-woption).
-c: Only use candidates explicitly specified in the "-i" argument.
By default, if a preprocessing file is specified using "-p", all images saved in the file are used as candidate images. The "-c" option tells Mosaigraph not to do this. Only images explicitly specified in an "-i" argument will be used as candidates.
This lets you specify a preprocessing file (and thus avoid repeatedly preprocessing images stored in it) without having to use all of the images it contains.
-e [edge length in pixels]: Change the size of the pieces.
Mosaigraph scales each image it uses as a piece of the mosaic in order to make each piece the same size (and clips them to make them square).
By default, each piece will be 100x100 pixels.
You can modify the size Mosaigraph scales images to using the -e argument. Setting "-e 200" will result in pieces that are 200x200 pixels, for example.
-i [image list]: Specify images to use in constructing the mosaic.
This is a space separated list of paths to images and/or directories that contain images.
If you are building a mosaic, the images will be used as the "pieces" of the mosaic. If you are saving a preprocessing file using -P, data on the referenced images will be saved to your preprocessing file.
The paths in "image list" can lead either to image files or to directories containing image files. If Mosaigraph encounters a directory in "image list", it will attempt to preprocess all files in that directory. Files that cannot be processed as images will be ignored. You can also use Unix wildcards like * in the "image list", which is convenient when referencing large numbers of images.
-l [log file path]: Produce a log of which images are used where.
When building a mosaic, use -l followed by a filename to output json-formatted information about the mosaic's construction. The json output is an array of objects, each of which contains information about a piece of the mosaic. That information includes the "x coordinate" and "y coordinate" of the piece, where the top left piece is (0, 0) and the one to its right is (1, 0), etc. It also includes the path of the candidate image used for that piece.
-n [number]: Adjust the number of pieces in the mosaic.
By default, mosaics constructed by Mosaigraph will be composed of about 500 pieces. If you want your mosaic to be composed of more or fewer pieces, you can adjust this with the "-n" argument.
The precise number of pieces in the final mosaic will usually not be exactly what you specify. This is because Mosaigraph tries to capture as much of the base image as it can, which constrains the proportions of the mosaic, and because the number of rows and the number of columns have to be integers, and the height and width of each piece have to be an integer number of pixels.
It will take longer to build a mosaic with more pieces. However, using more pieces usually means a sharper looking result.
-o [output file path]: Specify an output file.
If you want Mosaigraph to write the mosaic it makes to a file, use "-o filename". For example, to write the mosaic image to a file called "monacats.jpg" you might use:
python mosaigraph.py base_image -i image_list -o monacats.jpg
The filename extension you use will determine the format of the output. For example, use ".jpg" to produce JPEG output, or ".png" to produce PNG output, etc. You should be able to use any file type supported by the Pillow library and by your system.
-P [path to preprocessing file]: Save preprocessing data to this file.
Mosaigraph will save the results of any "preprocessing" to this file, if it is specified. In particular, any images listed under the "-i" argument that are not already in the preprocessing file will be preprocessed and the resulting data saved to the file.
-p [path to preprocessing file]: Use preprocessing data from this file.
When constructing a mosaic, all images saved to the specified preprocessing file will be used as candidate images. Instead of preprocessing those images (potentially a time consuming step), Mosaigraph will simply pull the data from the file.
-r: Randomize the order in which pieces are added to the mosaic.
By default, mosaics are constructed from the upper left down, and then to the right. This option randomizes the order in which pieces are added to the mosaic. Most of the time, the order in which pieces are added makes no difference. However, when using the "-u" option, the order does matter. See the discussion of this issue in the reference for the "-u" option.
-s [number]: Adjust the sample size.
When preprocessing and when deciding which of the candidate images to use in a mosaic, Mosaigraph takes random samples of pixels from each candidate image, and from each section of the base image. By default, Mosaigraph uses a sample size of 300. Usually this default works well. If you want, you can modify the sample size using the -s argument.
If you are pulling from a preprocessing file, and you are using the "slow" method of mosaic construction, Mosaigraph will disregard this option and switch to the sample size used when creating the preprocessing file (which may just be the default of 300).
Very low sample sizes will be faster, but will not yield good results.
-u: Don't reuse candidate images.
By default, Mosaigraph is allowed to reuse a given candidate image multiple times in a given mosaic. To make each piece "unique," so that candidate images are not reused, you can use the -u option.
Of course, if the -u option is selected, you have to provide at least enough candidate images to fill all the pieces.
Further, Mosaigraph's current approach to ensuring "uniqueness" is to simply remove images from the candidate pool as they are added to the mosaic. This means that areas of the mosaic constructed later may look worse than those constructed earlier, since we start to run out of good candidate images as we move along in the process. Since by default images are added to the mosaic from left to right, the right side can look worse than the left.
To mitigate this problem, use a large pool of candidate images relative to the number of pieces in your mosaic, so you don't end up "running low" as you get close to the end.
You can also consider using the "-r" option to randomize the order in which pieces are added. This way, pieces selected later will still look worse than ones added earlier, but they won't be grouped to one region of the mosaic (say, the right, if we started from the left). However, if you are not using enough candidate images in the first place, this just leads to a mosaic that looks equally bad all over.
An improved Mosaigraph would attempt to find an overall best fit when uniqueness is required - not only trying to match each piece to the best candidate, but also matching each candidate used to the best piece. That approach may be implemented at a later date.
-w: Select images using the slow, "pixelwise" method.
Deciding which image to use in which piece of the mosaic involves dividing the base image into sections, then finding a candidate that is visually similar to each section. Mosaigraph can use either of two basic methods to determine visual similarity.
The default "fast" method takes an "average" of the pixels in each candidate image, and compares it to an "average" of the pixels in the relevant area of the base image. The candidate whose average pixel is closest to the average pixel in a given section of the base image will be used in that same section of the mosaic. So if the base image is reddish in one section, Mosaigraph will fill that section in with a candidate image that is equally reddish overall. This can work, but details in the base image can be averaged out and lost.
The "slow" method, used whenever "-w" is specified, compares a sample of pixels in each candidate to the corresponding pixels in each base image section. Mosaigraph takes the average difference between these corresponding pixels. The candidate with the lowest average difference will be used in that section of the mosaic. With this method, if a section of the base image is red at the top, but blue lower down, Mosaigraph will attempt to find a candidate image that is also red at the top but blue lower down. This allows more detail to come through in the mosaic compared with the fast, averaging method. One caveat - since it ignores overall "average" colors in favor of a detailed, pixelwise comparison, the slow method can produce mosaics that seem to have the wrong overall tint to them (see the "slow" Neil Armstrong image in the "Examples" section).
To use this second, slower method, use the "-w" option.
-x: Don't display mosaic after completion.
If you use the "-x" option, Mosaigraph will not display the mosaic after constructing it. If you don't specify an output file, the mosaic will be lost and never seen.